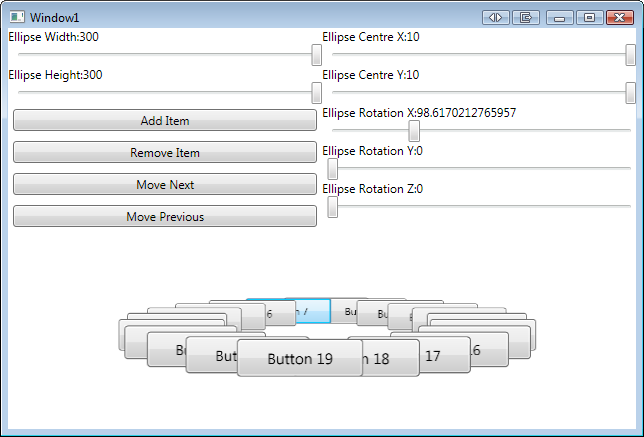
The post WPF Elliptical Layout Control – 3D! was way more popular than I ever could have imagined with people still viewing and downloading the code daily. Not bad for a post that’s 6 years old! However, as you can imagine the code and solution are pretty outdated now with a few unresolved issues. Given the amount of views it still gets, I decided it was time to revisit it and see if I can bring it up to date.
Source Code
Durable Task Framework – Testing a TaskActivity
Problem
You’ve created an orchestration using the Service Bus Durable Task Framework that makes use of several tasks, but you want to be able to test out each task in isolation.
Solution
The Durable Task Test Framework provides you with a utility class that makes creating and executing a new orchestration with a single task painless and easy. Whilst this isn’t a unit test by any stretch of the imagination, the MSTest framework is perfect for running your tasks one by one and making sure everything is as it should be.
How it Works
Creating and configuring an orchestration is relatively simple, but involves quite a few lines of code. If you’re just testing a single TaskActivity, there’s no point in doing that over and over again, so I created a simple helper class to take care of the grunt work!
Continue reading
Durable Task Framework – Complex Types as Task Input Parameters
In my last post, Using Unity With The Durable Task Framework, I mentioned that I had originally overlooked the fact that the data passed to and from your TaskActivity objects in an orchestration are serialized and sent over the wire. If you’re using simple types then this isn’t a problem, but usually we want to be able to pass in something with a little more information.
ViewStubs and root elements
This might seem like a very obvious thing to most, but for me it was not. In some code I’ve inherited, ViewStub is used a great deal and works well, except for when I was trying to resolve the root element of the inflated content. For example the following (greatly simplified) setup:
Host view XML
<LinearLayout
    xmlns:android="http://schemas.android.com/apk/res/android"
    android:id="@+id/content"
    android:layout_width="fill_parent"
    android:layout_height="fill_parent"
    android:orientation="vertical">

    <RelativeLayout
        android:layout_width="fill_parent"
        android:layout_height="0dp"
        android:layout_weight="1">

	    <ViewStub
	        android:id="@id/stub_import"
                android:inflatedId="@id/content_import"
                android:layout="@layout/splash"
                android:layout_width="fill_parent"
                android:layout_height="fill_parent" />

    </RelativeLayout>
</LinearLayout>
</pre>

<!--more-->

<h4>Content View XML</h4>
<pre class="prettyprint lang-xml">
<?xml version="1.0" encoding="utf-8"?>
<LinearLayout
    xmlns:android="http://schemas.android.com/apk/res/android"
    android:layout_width="fill_parent"
    android:layout_height="fill_parent"
    android:orientation="vertical"
    android:id="@+id/root_control">

    <LinearLayout
        android:id="@+id/some_sub_control"
        android:layout_width="fill_parent"
	android:layout_height="wrap_content"
	android:orientation="vertical">

    </LinearLayout>
</LinearLayout>
Then in the your Activity:
public void onCreate(Bundle savedInstanceState) {
    super.onCreate(savedInstanceState);

    ViewStub stub = (ViewStub)this.findViewById(R.id.stub_import);
    stub.setInflatedId(R.id.content_import);
    stub.setLayoutResource(R.layout.content);
    stub.inflate();

    // rootElement will be null!!
    LinearLayout rootElement = (LinearLayout)this.findViewById(R.id.root_control);

    // subControl holds a reference to the expected control.
    LinearLayout subControl = (LinearLayout)this.findViewById(R.id.some_sub_control);
}
So what’s going on here? Well three things really! Mostly that I should pay attention more and not rush so much. Those small details you can easily overlook often turn out to be the cause of your problems. The other two things are pretty much the same thing:
android:inflatedId="@id/content_import"

// From the Java code
stub.setInflatedId(R.id.content_import);
So here, they’re instructing the ViewStub to give the inflated content a new id once the ViewStub has been replaced. Great! Why they did it twice is anyone’s guess but that was the problem. Remove that code and hey presto! It works as expected. Also, another handy tip is that you can also get a reference to the inflated content via the result of the call to inflate().
LinearLayout rootElement = (LinearLayout)stub.inflate();
// Gets you the same thing as...
LinearLayout rootElement = (LinearLayout)this.findViewById(R.id.root_control);
.Net 4.0 Printing Made Easy – Part 1 – Introduction
Welcome to the fist part of my ‘.Net 4.0 Printing Made Easy’ series. In this part we’ll take a quick look at the .Net printing support, what it does do for us and just as important, what it doesn’t do for us.
In .Net 3.0 we were given a great new printing framework based around XPS documents. This immediately opened up a world of vector based printing where you can print your WPF vector controls and have them appear as sharp as ever, or if printing to an XPS or PDF document, your print out will be preserved in its full vector glory. What makes this even better is that you as a developer don’t have to worry about any of this, you just send your data off to one of the many methods provided and the rest is done for you. There are of course some instances where you can’t print raw vector data out and need to handled rasterised data. This too is very simple and there are a few tricks you can use to make it even easier.
Silverlight 2.0 Elliptical Control 3D!
Well it has been a busy time for me since my last post, so this one took a little longer to get out. Fuelled by the launch of Silverlight 2.0 and my desire to give it another go (being a WPF developer I was a little put off by the bareness of 1.0) and set about finding a little project I could undertake to help me learn the ropes. I had several ideas (read, future blog posts!), but the most logical was to port the 3D ellipse control I wrote in WPF across to Silverlight 2.0. It was a fairly straightforward port and a real eye-opener to what the differences between Silverlight and WPF really mean.
The biggest challenge was the lack of the Media3D namespace. This prompted me to start building up a library of classes that aren’t included in Silverlight. So far I have created a Point3 (Point3D), Vector3 (Vector3D) and Quaternion (Quaternion). They are all basic implementations at the moment and contain just enough functionality to allow me to create the sample.
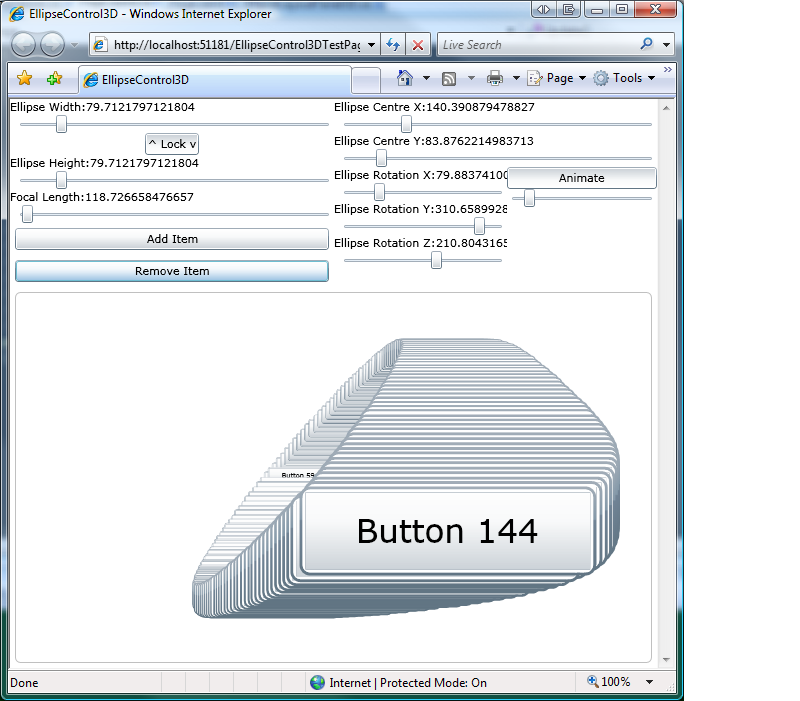
To overcome the lack of Viewport2DVisual3D, I calculate the scale for each child control based on it’s depth in the scene. This is a bit of a hack rather than a proper perspective correct transformation as I didn’t have the time to spend creating a camera implementation and setting everything up properly. Instead I make do with a camera focal length and combine that with the z value of each object to calculate how big it should appear on the screen, otherwise you wouldn’t be able to tell which controls are further away from the screen. Using a ScaleTransform ensures that the control appears correctly, but with a sense of depth.
Z-ordering is also taken care of, ensuring items deeper in to the scene appear underneath items which are closer to the screen. There are also a few little extras in there such as being able to animate the rotation of the ellipse, which when played around with can create some awesome effects.
The screenshot below shows the app running in full swing. Animation is enabled and a very small focal length is used, making the objects close to the camera appear much larger than those further back. There were around 200 buttons in the control at the time and it coped really well.
WPF Elliptical Layout Control – 3D!
After finishing my last post, WPF Elliptical Layout Control, I sat down and wondered what to do next. It occurred to me that creating a 3D carousel in WPF is a common question and one that doesn’t have all that many examples. A 3D control is also a natural progression from the 2D control and is not all that different. All we need to do is layout the objects in 2D, then rotate those points according to the orientation of the imaginary layout ellipse, taking in to account depth.
This example creates a new control which derives from FrameworkElement and is very similar to the implementation of the Viewport3D control. The new control overrides the measure and layout methods of FrameworkElement and positions the child controls (supplied as a collection of UIElements) according to the orientation of an imaginary 2D ellipse in 3D space.
It is assumed that the reader has some knowledge of custom controls, LINQ and 3D in WPF. The code provided is by no means an ideal implementation of the theory, it should be thought of more as a quick demonstration of the concept. And remember, in WPF there is almost always more than one way of doing the same thing, mine is just my take on the problem :0)

WPF Elliptical Layout Control
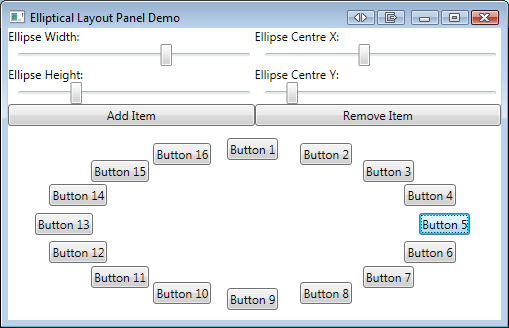
Today I was talking to a good friend and former colleague and he asked how I would go about laying out a collection of controls as if they were equally spread out around the edge of an ellipse. I did a quick Google and didn’t find much in the way of examples, so I decided to knock one together. An hour later and we have what I present here.
This is a fully working, but a little rough, demonstration of creating your own control and performing custom layout logic.


